Concept preview prepared for Marcus Art Australia
Swirling layers of water based enamel
  1. Home
  2. Techniques & videos

Techniques & videos.

Step-by-step ideas for every Marcus Art material, from first colour mixing with young children to encaustic, stained glass and casting.

Watch

See the materials in action.

Press play to watch here on the page.

Spanish Woman

A portrait painted in Marcus Art Oil Pastels.

Asher Bilu on ABC Sunday Arts

The artist at work with water based enamel (April 2007).

Techniques

Pick a material.

20 techniques to try in the studio, the classroom or at home.

Colourful oil pastel artwork of two hands
01

Colour mixing

A wonderful way to teach young children how colours work.

  1. Blend two colours together with your fingers.
  2. Wipe your hands clean before the next colour, just like a brush.
  3. Build colour charts: a primary, then a second colour worked into it, then secondary and tertiary mixes.
02

Blending

The wax base softens with the warmth of your hand. Spread colour with fingers, a palette knife or a soft cloth. A tissue gives veiled, watercolour-like effects.

Use small amounts and contrast thin and thick areas. It’s easier to control, especially for fine detail.

03

Blending by layering

  1. Cross-hatch or dot one colour over another.
  2. Smudge with a finger to break up the lines and blend.
  3. Keep layering to build the shade you want. A touch of the opaque Titanium White makes tints.

Fix the sheet with Non-Drip Varnish and you can print over the background.

Thick, textured oil pastel colour
04

Impasto

Soft enough to build a thick, vibrant, textured painting on canvas or canvas board, without the bulk or drying time of oil paint.

Pencil drawing softly shaded with oil pastel
05

Shading

  1. Fix a graphite drawing with Non-Drip Varnish and let it dry.
  2. Add a few marks of pastel.
  3. Rub them out with paper towel for soft, watercolour-like shading.
06

Encaustic

Warm the pastel with a hair dryer and watch the colour melt and flatten. Then scratch back into the surface with a satay stick to draw lines.

07

Mono-printing

  1. Lay down colour on one sheet.
  2. Place it face down on a second sheet.
  3. Draw on the back with a pencil. The pressure transfers coloured lines to the sheet below.
08

Sgraffito & metallics

Scratch through the top layer with a satay stick to reveal the colour underneath.

Blend the metallic silver, gold and copper into other colours for colour that shifts as you move around it.

Water Based Enamels

About the product
Dotted, layered enamel artwork
01

Layering & collage

  1. Pre-mix colours in small squeeze bottles.
  2. Apply over a drawn design, letting each layer dry.
  3. Pour or drip enamel, then cut the dried skins into shapes and collage them back in with clear enamel.
Richly coloured enamel painting
02

Painting

Transparent and self-levelling, so it makes a brilliant glaze. Work wet-into-wet over charcoal or pastel, or over acrylic. It re-wets with water, so you can come back to a piece later.

Tip: it will run on a vertical surface.

03

Sculpture

Drag fishing line, wire or strong thread through a shallow bath of enamel and build up coats into a mobile or free-standing piece.

Cast sheets of colour and join them into planes, then add light for a striking result.

Enamel artwork with glowing colour
04

Stained glass effect

  1. Outline your design on an acrylic or perspex sheet with PVA glue thickened with pigment.
  2. Fill each shape with enamel from a squeeze bottle.
  3. Once dry, peel it off and hang it where light shines through.
Swirled 3D enamel collage
05

3D collage

The clear enamel doubles as a strong glue and seal. Set found objects, minerals, bronze powders or interference pigments in place, then encase them in enamel.

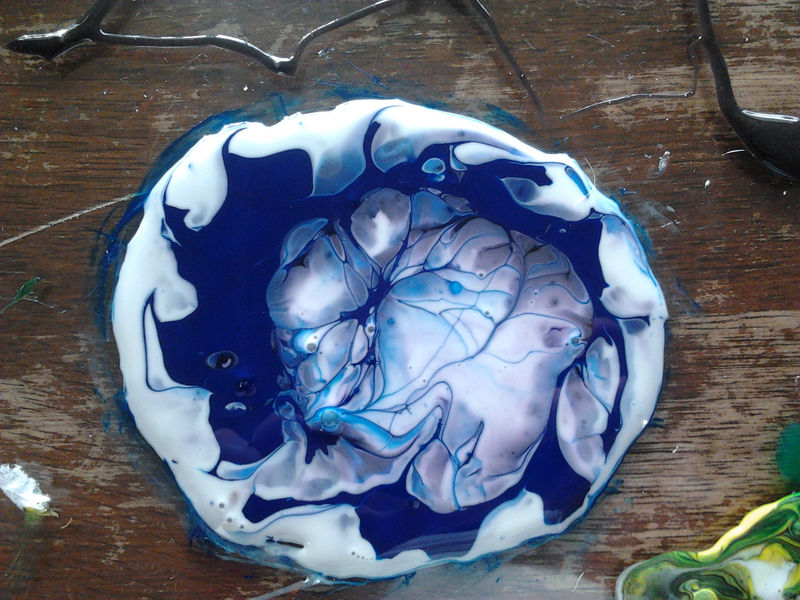
Blue and white enamel cast in a bowl shape
06

Plastic casting

  1. Fill an open mould with enamel, then pour it out, leaving a thin skin.
  2. Dry it with a heat gun or hair dryer.
  3. Repeat to thicken, then back-fill with plaster or resin to finish the form.

Drawing Blocks

About the product
Relief rubbing with a drawing block
01

Relief rubbing

Lay paper over a leaf, corrugated cardboard or a textured rock, then drag the broad edge of the block across it. Layer several colours and try different papers.

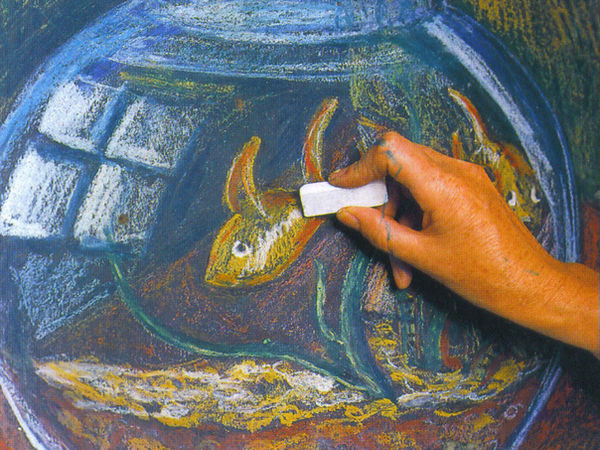
Drawing a fish with a drawing block
02

Drawing

The hard, domino shape makes lines, hatching and broad shading easy. Try working on a pre-coloured surface and draw quickly and confidently.

Blended drawing block colours
03

Blending

Blend with a cloth, tissue or strong paper towel. Used with great results by everyone from preschoolers to professional artists.

Water Colours

About the product
Blue and white bowl painted with water colours
01

Drawing & painting

Draw with it like an oil pastel, then extend the drawing with a water-loaded brush.

Pink flowers painted with water colours
02

Gouache & impasto

Rich pigment lets you move from delicate washes to strong colour, contrasting transparent and opaque areas like gouache.

Bird painted with water colour washes
03

Water colour washes

Because it dissolves in water, you can bring in brushwork for both broad gestures and fine detail.

Running a class or workshop?

We can help you choose the right materials for your students and quantities.

Call (03) 9720 8779